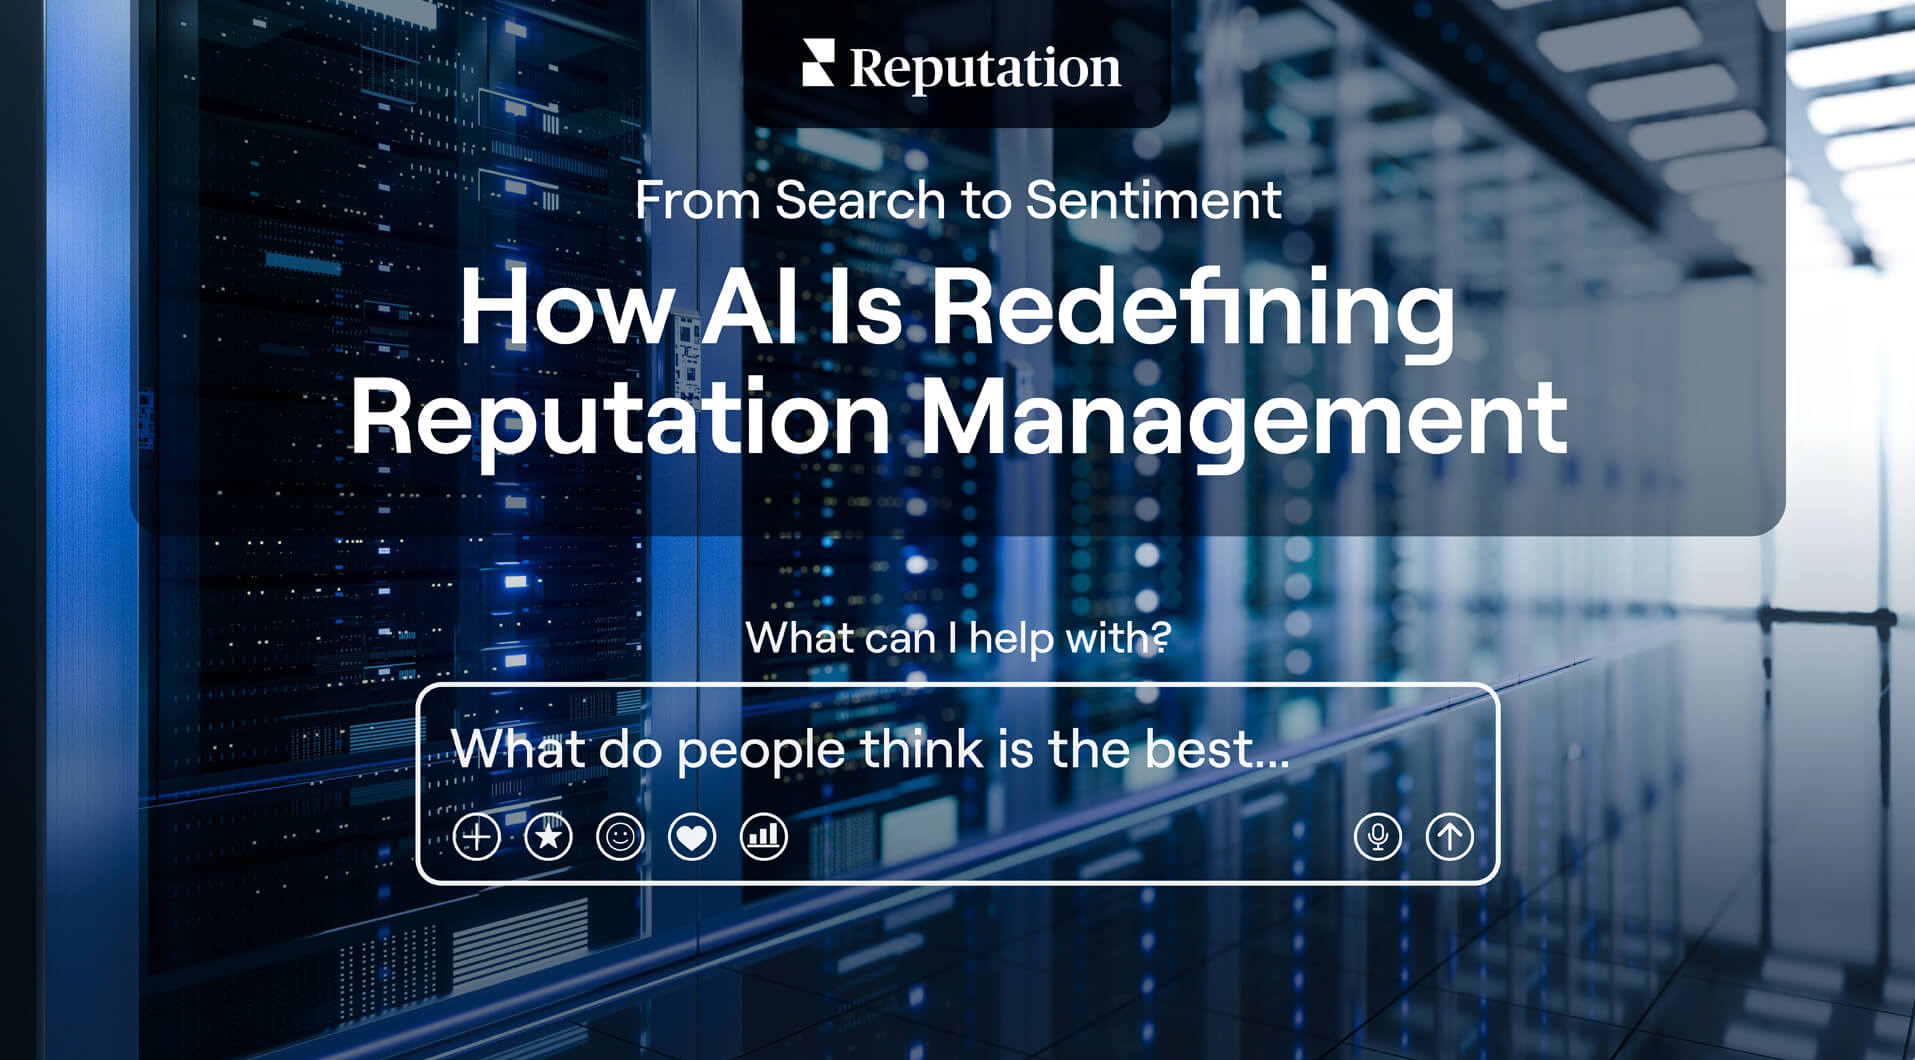
AI Is Changing the Rules of Discovery, Reputation, and Trust
Your reputation is dynamic and moves in real time. Bolt–on AI won’t drive meaningful outcomes. We rebuilt our entire platform for this new era with AI at the core, so you stay ahead of change—and the competition.
Cary Bran, our VP of Product AI, Insights, and Reporting does an in depth demo of one our latest product additions. Track how ChatGPT, Gemini, and Perplexity describe your brand—sentiment, sources, rankings, and listing accuracy—enabling monthly AEO/GEO optimization.
The New Rules of Reputation Management and How You Win
Always know and always act with greater clarity and control —
Customer feedback never sleeps—neither should your insights. Reputation’s AI-native platform turns every signal into decisive, revenue-driving action. Track, analyze, and respond to customer reviews across every platform.
One Platform.
Built to Perform in the AI Era.

Medium length section heading goes here
Lorem ipsum dolor sit amet, consectetur adipiscing elit. Suspendisse varius enim in eros elementum tristique.
Medium length section heading goes here
Lorem ipsum dolor sit amet, consectetur adipiscing elit. Suspendisse varius enim in eros elementum tristique.
Medium length section heading goes here
Lorem ipsum dolor sit amet, consectetur adipiscing elit. Suspendisse varius enim in eros elementum tristique.
Medium length section heading goes here
Lorem ipsum dolor sit amet, consectetur adipiscing elit. Suspendisse varius enim in eros elementum tristique.
Medium length section heading goes here
Lorem ipsum dolor sit amet, consectetur adipiscing elit. Suspendisse varius enim in eros elementum tristique.
Medium length section heading goes here
Lorem ipsum dolor sit amet, consectetur adipiscing elit. Suspendisse varius enim in eros elementum tristique.
Medium length section heading goes here
Lorem ipsum dolor sit amet, consectetur adipiscing elit. Suspendisse varius enim in eros elementum tristique.
Medium length section heading goes here
Lorem ipsum dolor sit amet, consectetur adipiscing elit. Suspendisse varius enim in eros elementum tristique.
Medium length section heading goes here
Lorem ipsum dolor sit amet, consectetur adipiscing elit. Suspendisse varius enim in eros elementum tristique.
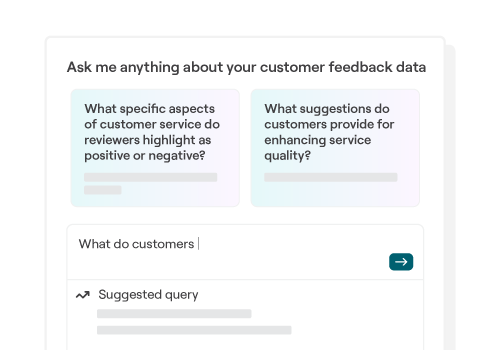
Reputation® IQ
Instant Answers.
Operational Action. Ask in plain English and get decision-ready answers from review data—fast.
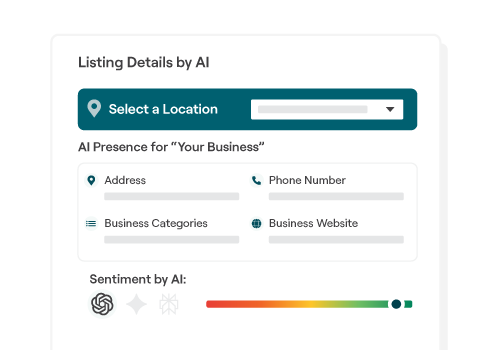
Listings + Local SEO
Accuracy at Scale. Visibility in AI.
Win AI discovery and local search with structured, always-current brand data.
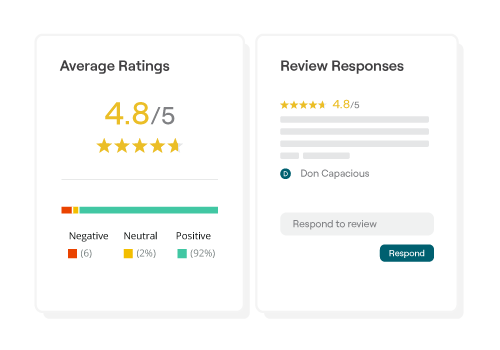
Reviews & Review Booster
More Reviews. Faster Response.
Generate review volume consistently, protect trust, and improve performance by location.
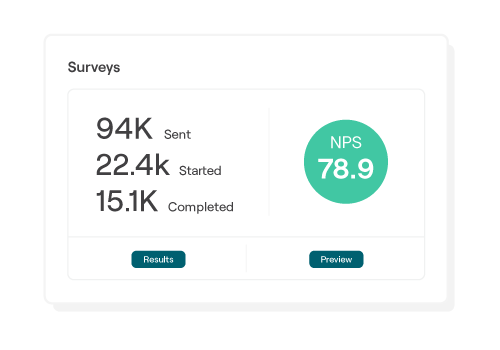
Surveys
Private Feedback. Faster Fixes.
Capture the “why,” route it to owners, and turn responses into measurable improvement.
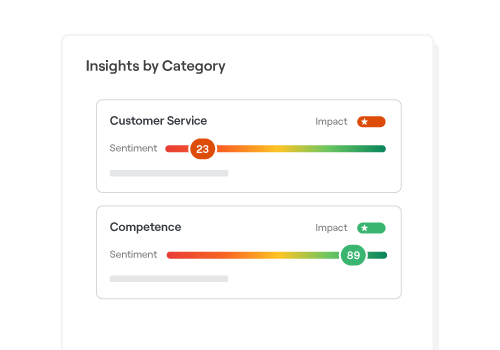
Insights
From Signals to Strategy.
Unify signals, reveal what’s changing, and prioritize what matters next.

Competitive Insights
Benchmark Locally. Win Market Share.
See where you stand, where competitors win, and what to change to overtake them.
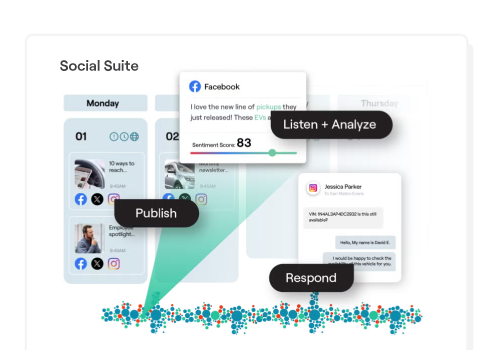
Social Suite
Publish with Control. Respond in One Place.
Centralize publishing and engagement across locations without sacrificing brand consistency.
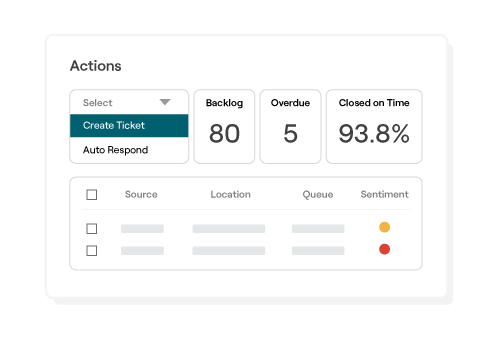
Actions
Issue Spotted. Issue Solved.
Turn feedback into routed tickets with tracking and accountability—across every location.
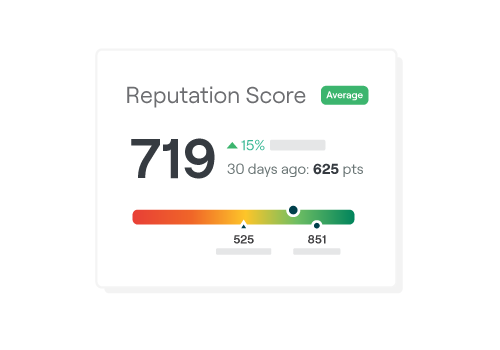
Rep Score
A Single Number That Reflects Every Voice.
There are nine factors that capture how customers experience you — in one metric
AI built-in. Not bolt-on.
We rebuilt our entire platform to put AI at our core, driving faster responses, smarter fixes, and stronger signals.
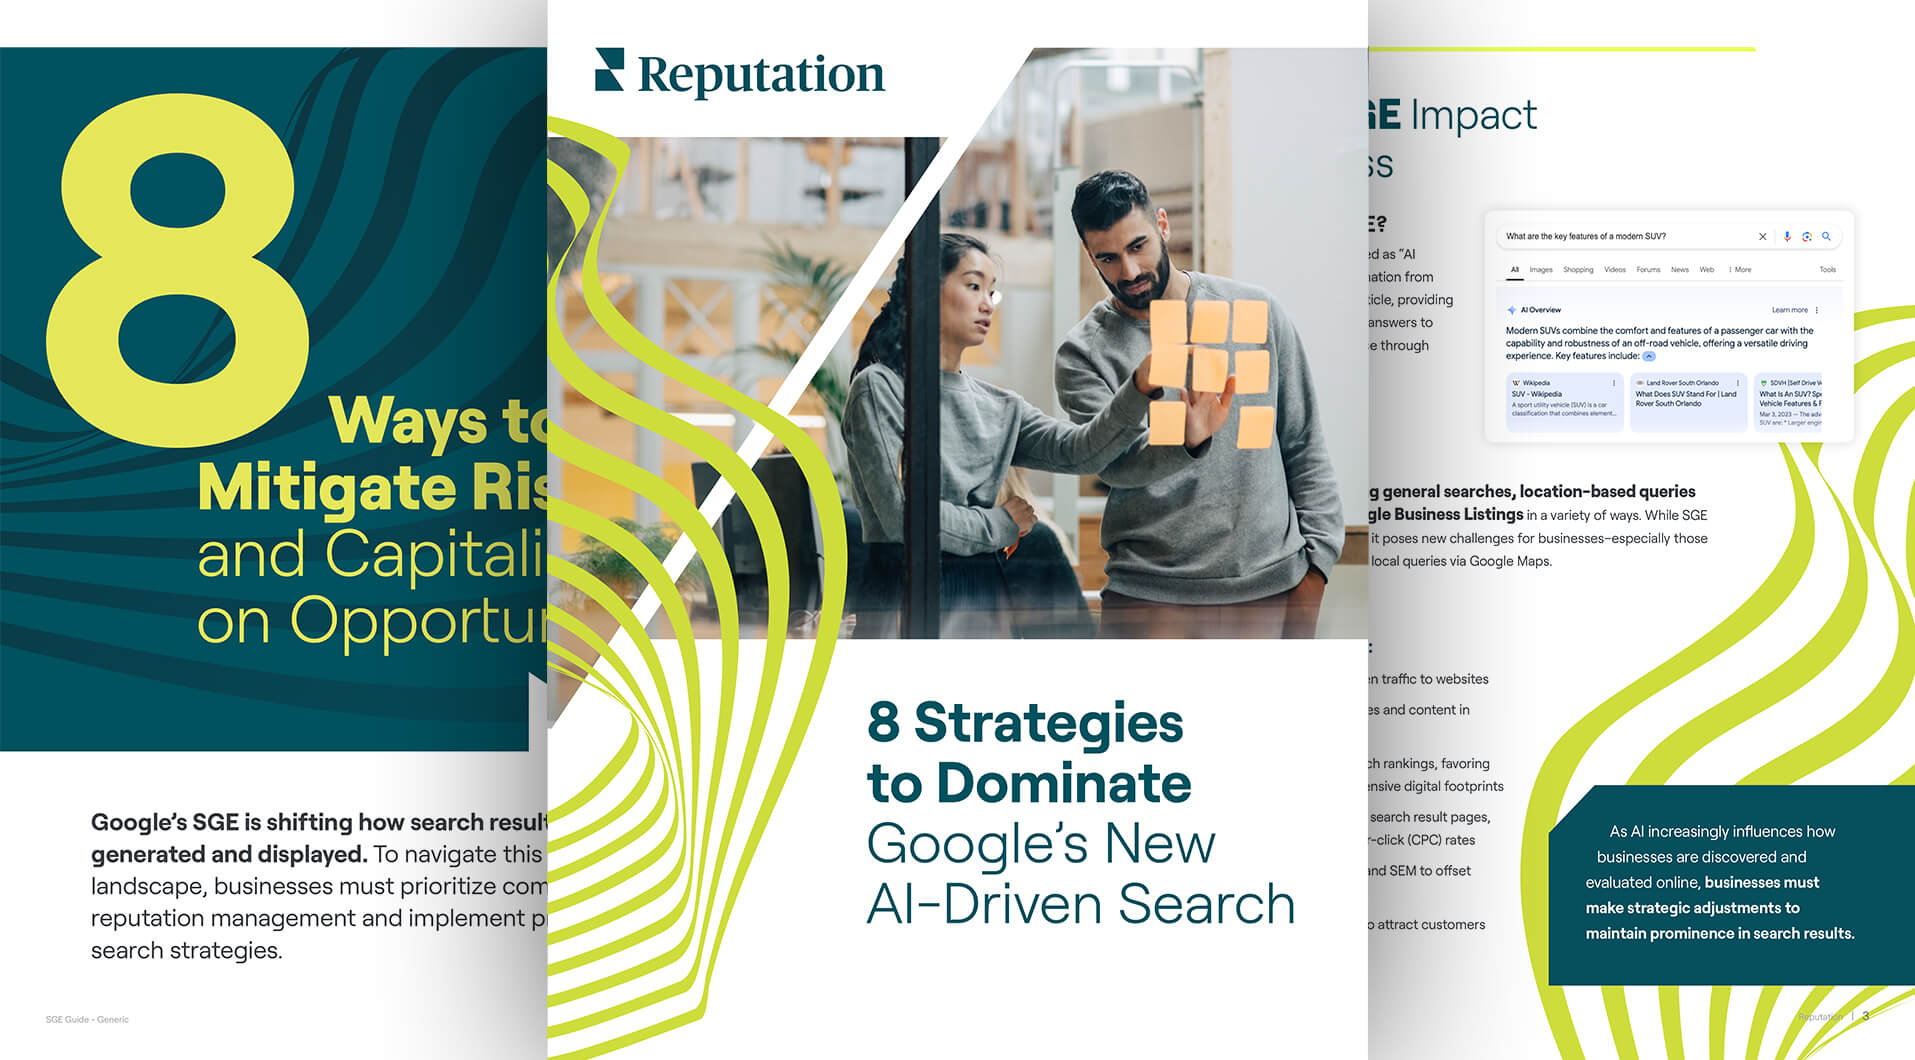
The 8-Step Blueprint for Mastering Google AI Search
Your Customers Understood. Your Teams Empowered. Your Industry—Already Built In.
Medium length section heading goes here
Lorem ipsum dolor sit amet, consectetur adipiscing elit. Suspendisse varius enim in eros elementum tristique.
Medium length section heading goes here
Lorem ipsum dolor sit amet, consectetur adipiscing elit. Suspendisse varius enim in eros elementum tristique.
Medium length section heading goes here
Lorem ipsum dolor sit amet, consectetur adipiscing elit. Suspendisse varius enim in eros elementum tristique.
Medium length section heading goes here
Lorem ipsum dolor sit amet, consectetur adipiscing elit. Suspendisse varius enim in eros elementum tristique.
Medium length section heading goes here
Lorem ipsum dolor sit amet, consectetur adipiscing elit. Suspendisse varius enim in eros elementum tristique.
Medium length section heading goes here
Lorem ipsum dolor sit amet, consectetur adipiscing elit. Suspendisse varius enim in eros elementum tristique.
Medium length section heading goes here
Lorem ipsum dolor sit amet, consectetur adipiscing elit. Suspendisse varius enim in eros elementum tristique.
Medium length section heading goes here
Lorem ipsum dolor sit amet, consectetur adipiscing elit. Suspendisse varius enim in eros elementum tristique.
Medium length section heading goes here
Lorem ipsum dolor sit amet, consectetur adipiscing elit. Suspendisse varius enim in eros elementum tristique.

Automotive
Drive More Feedback
Accelerate Sales
Improve Satisfaction

Healthcare
Real-Time Feedback
Better Service Recovery
Build Trust at Scale

Food & Beverage
Enhance Visibility
Attract Customers
Identify Opportunities

Real Estate
Elevate Occupancy
Retain Residents
Outpace Competitors

Care & Living
Increase Tour Requests
Resolve Issues Faster
Earn Family Trust

Retail
Win More Foot Traffic
Protect Brand Consistency
Turn Feedback Into Improvements

Financial Services
Strengthen Client Trust
Respond Securely & Compliantly
Grow Referrals & New Accounts
Your Customers Understood.
With 15 years of industry-specific development, the Reputation platform adapts to your business because it was built from the strategies that define it. From car dealerships to clinics, franchises to care homes—Reputation adapts to your industry because it was shaped by it.
AI Is Rewriting the Rules of Reputation–Are You Ready?